

How To Draw Easter Bunny Easy
Easter is one of the virtually colorful and widely celebrated holidays in the earth. Every yr, millions of excited kids around the world wake up on Easter morning to chocolate treats and colorful egg hunts.
These eggs are said to exist delivered by the Easter Bunny, a very decorated rabbit that makes Easter magic happen!
This holiday is special to many people, and fans of the occasion may like to know how they can learn how to draw the Easter Bunny.
If you lot are one of those Easter devotees, then this volition be a tutorial that volition help you to properly celebrate this wonderful occasion.
Our step-past-footstep guide on how to depict the Easter Bunny in merely 6 piece of cake steps will prove you how fun and easy cartoon this jolly rodent can be!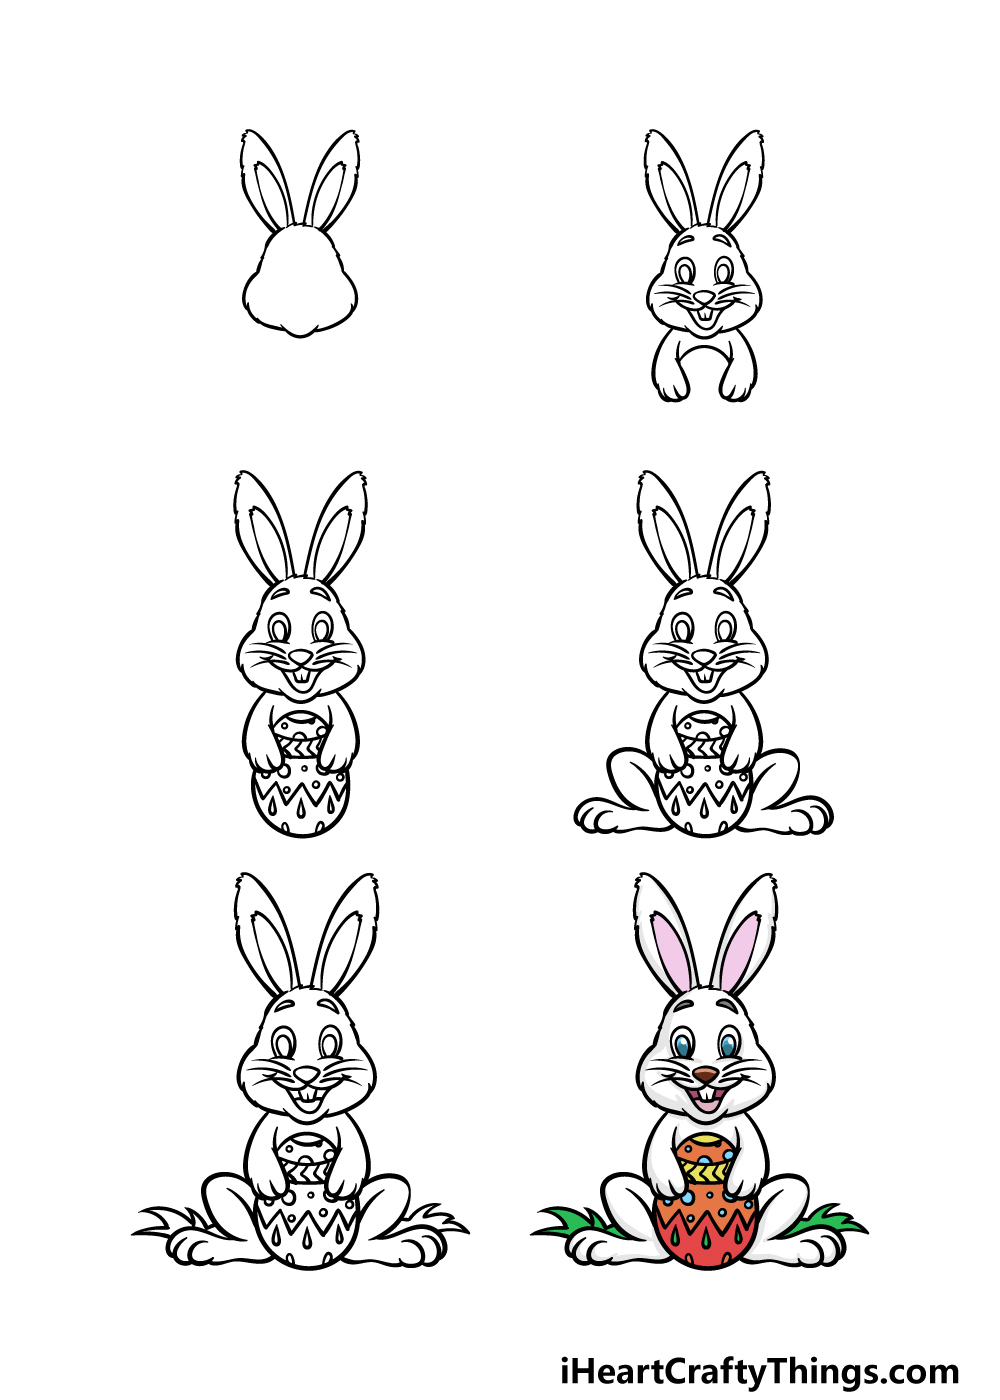
What's in this Weblog Mail
- How to Draw The Easter Bunny – Let's Become Started!
- Step i
- Stride 2 – Now, describe some facial details and artillery for the Easter Bunny
- Step 3 – Draw the rest of the Easter egg it is property
- Step 4 – Next, depict the legs for the Easter Bunny
- Step v – Add the last details to your Easter Bunny cartoon
- Step vi – Finish off your Easter Bunny drawing with color
- Your Easter Bunny Drawing is Complete!
How to Describe The Easter Bunny – Permit's Get Started!
Footstep 1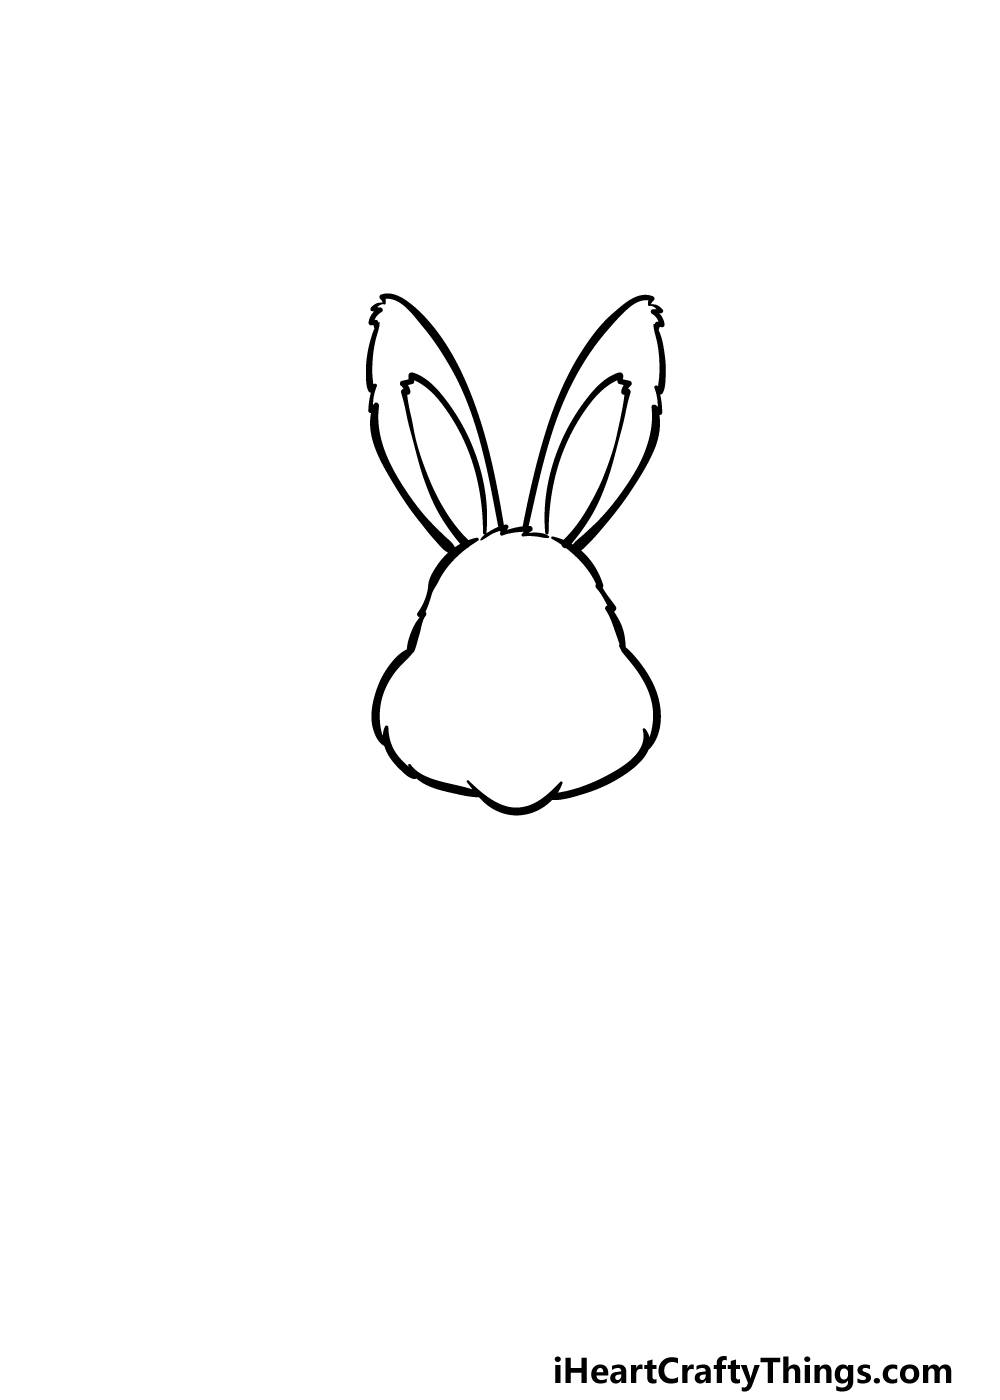
We will begin this guide on how to draw the Easter Bunny with the outline of the head and ears. When drawing whatever of the outlines for the bunny, we will be using a slightly jagged line.
Using this instead of a polish line volition aid to ensure that the bunny looks nice and fluffy. Draw the outline for the caput with a thinner circular shape for the top half and a thicker portion for the lower half.
Then, use two long, sparse and rounded shapes for the outlines of the ears. Finish these off past drawing some sparse oval shapes inside of them for the inner ears, and and so we can movement on to pace 2.
Stride 2 – Now, depict some facial details and artillery for the Easter Bunny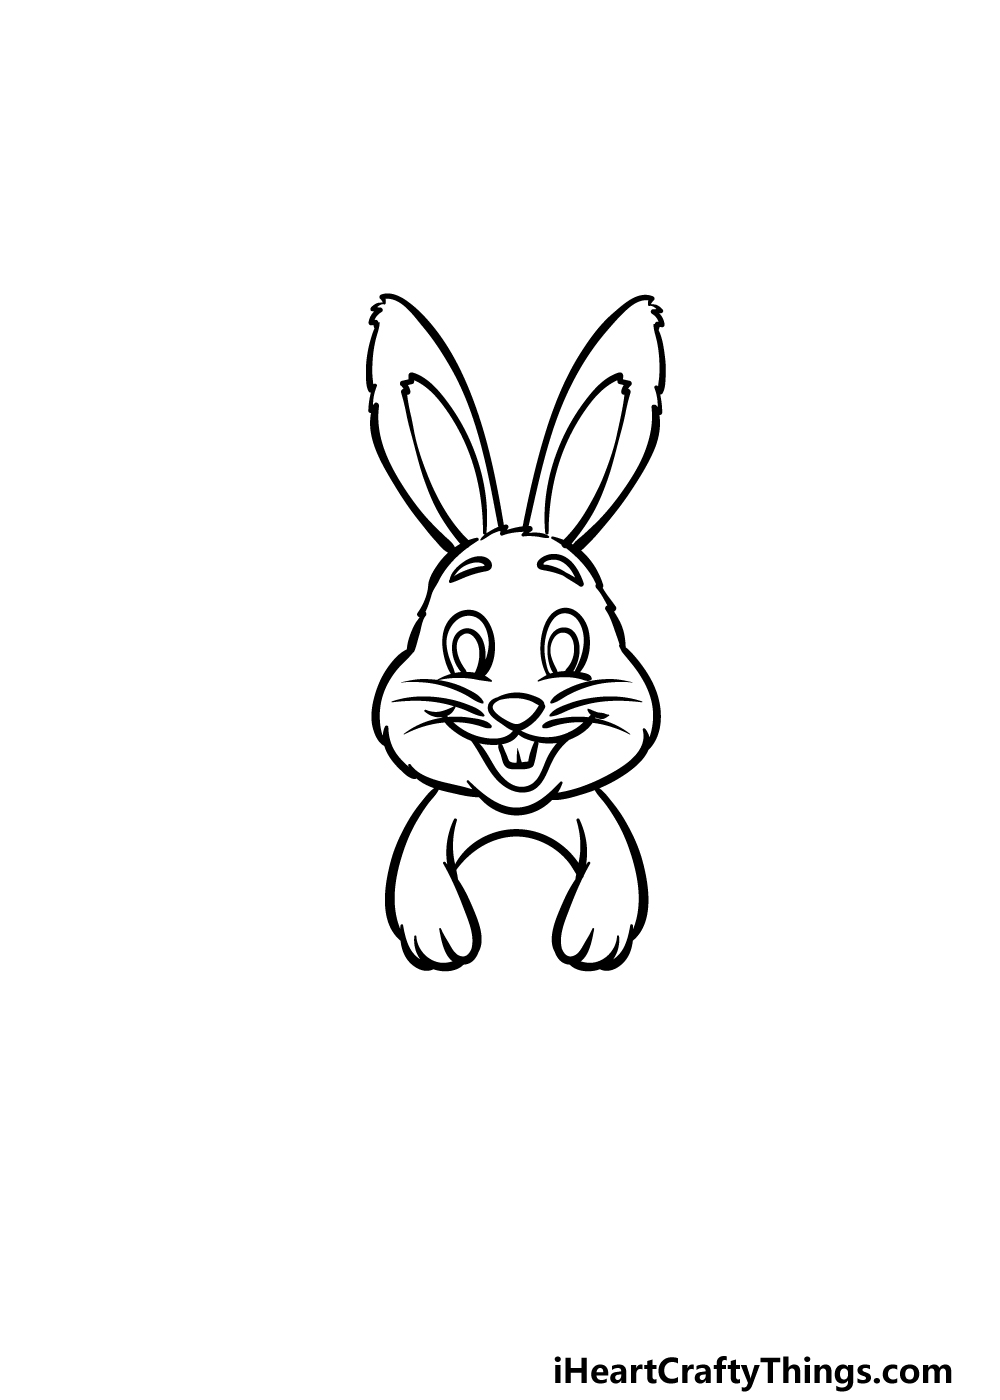
At present that you have the outline for the head and ears done, we tin can focus on some details also as calculation the arms for your Easter Bunny drawing.
For the eyes, draw some small-scale oval shapes that have some even smaller round shapes within them.
Then, there will be a rounded triangular nose beneath the eyes, and this will have some curved lines coming out from the bottom for the grinning mouth.
Add some squared teeth to the roof of the mouth, then describe the bottom of the open up rima oris.
Finally, utilise some more of those jagged lines for the furry arms of the Easter Bunny dropping downwards.
Connect these with a rounded line near the top of the artillery for the tip of a big egg the bunny will presently concord.
Footstep 3 – Draw the rest of the Easter egg it is holding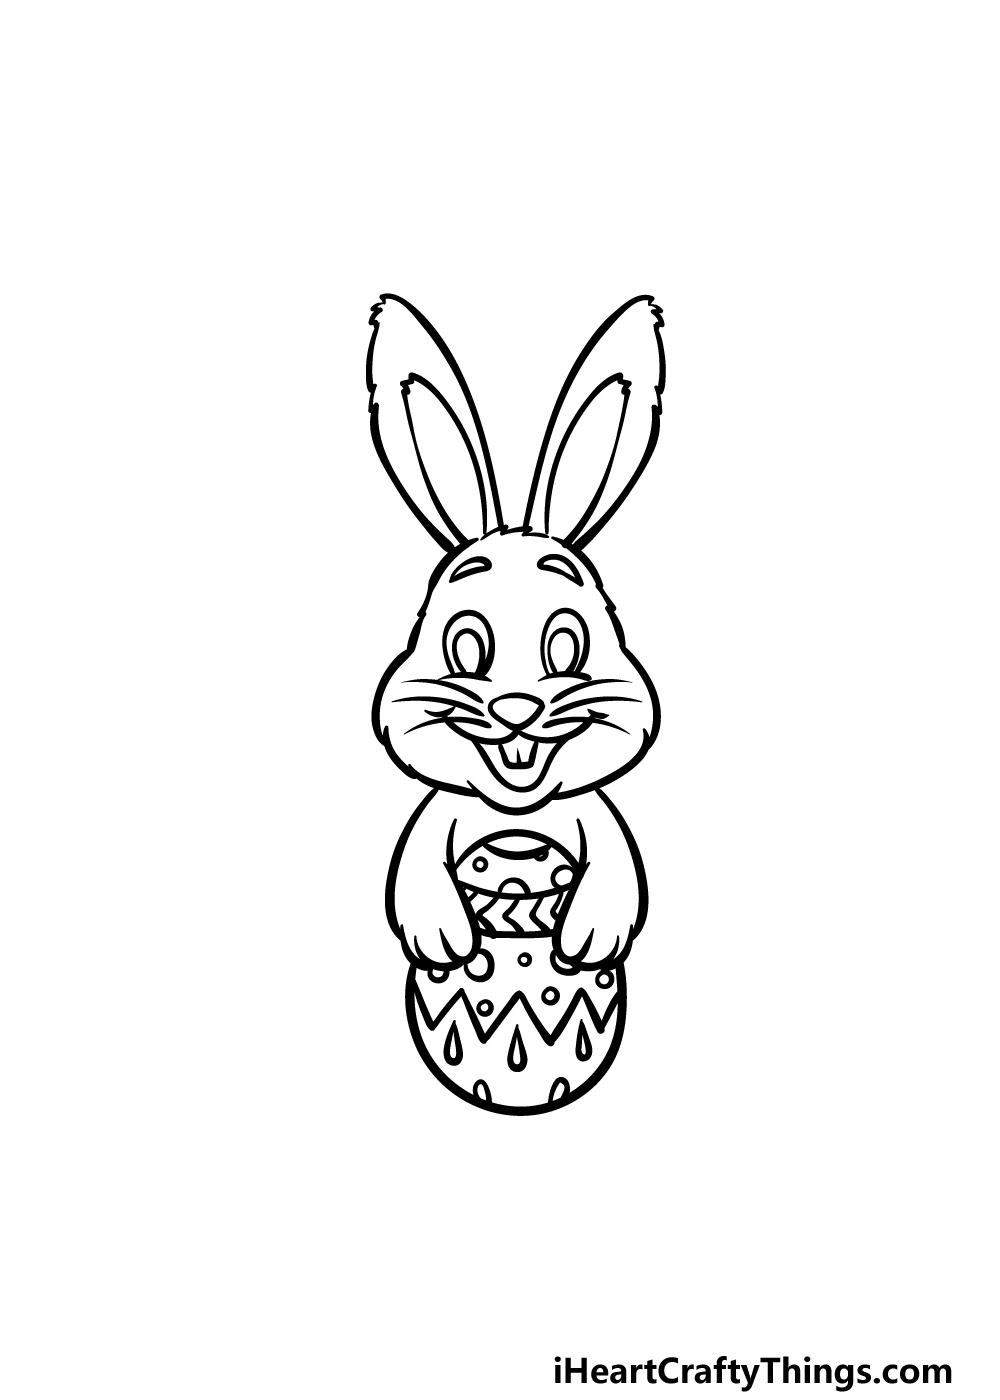
It wouldn't be much of an Easter image without a big, colorful Easter egg!
For that reason, we will be adding the rest of the egg y'all started drawing in the previous step of our guide on how to draw the Easter Bunny.
Starting time, use a rounded line to draw the bottom half of the egg in a way that makes information technology look like it would connect to the tip you drew previously.
And then, it will but be a affair of decorating the egg! We used some pointy lines, small-scale circles and other shapes to decorate our example, merely yous could decorate information technology in any fashion that you like!
Step 4 – Next, depict the legs for the Easter Bunny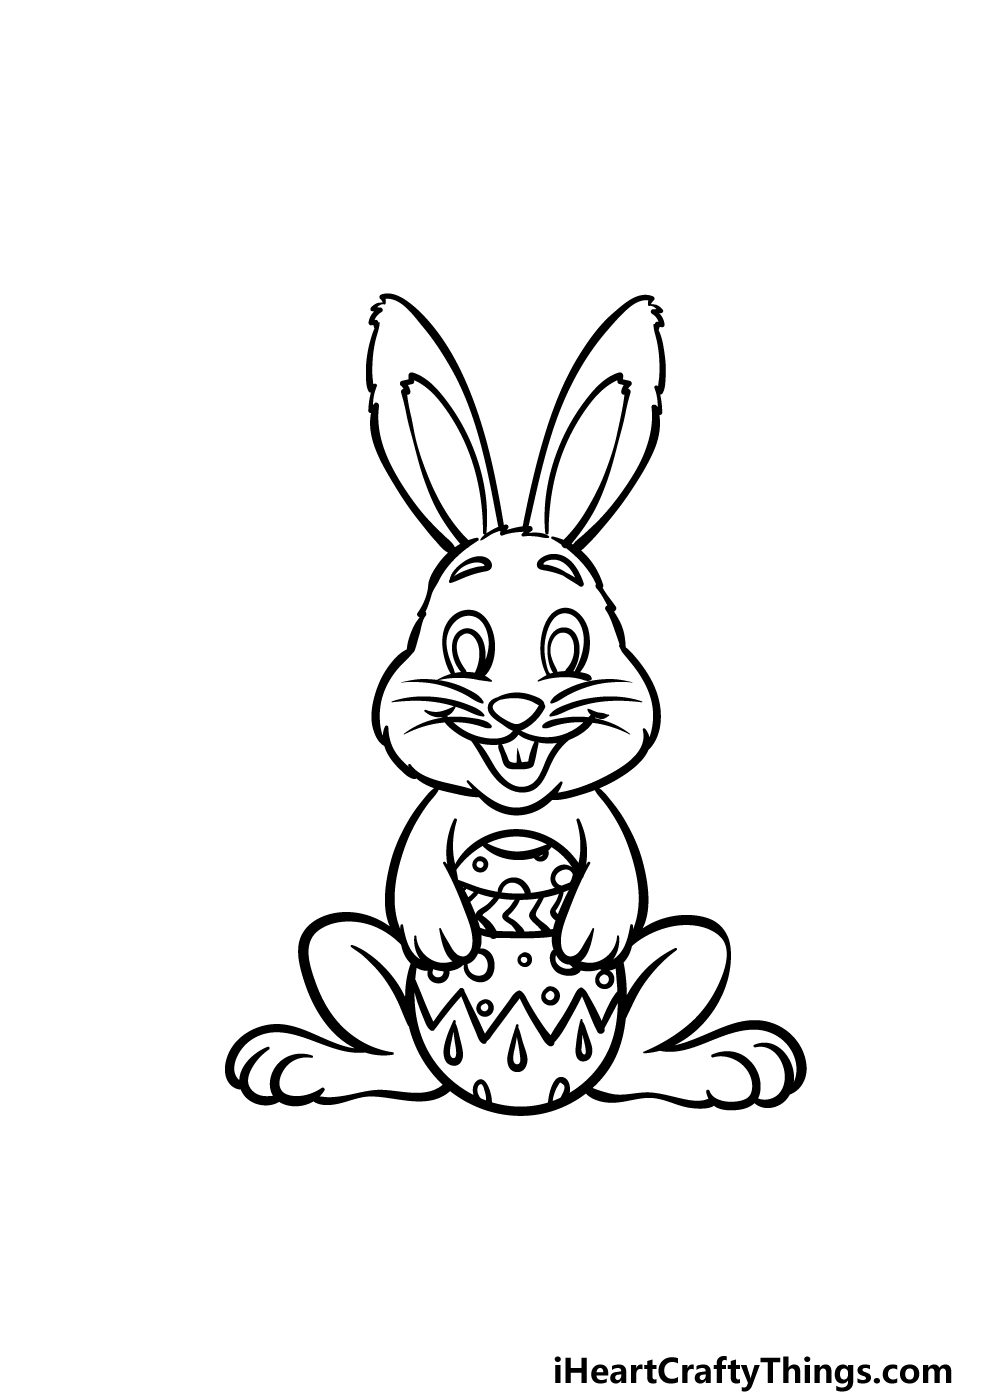
Nosotros will be finishing off the outline for the bunny in this function of your Easter Bunny drawing. That volition have y'all prepare for the concluding details in the next stride of the guide.
We will mainly be focused on the legs of the bunny in this step, and you tin can draw the legs using some sharply curved lines.
And then, draw the long, apartment feet of the bunny with some smaller rounded lines for the toes. You lot'll then exist ready for those final details in the next step!
Step 5 – Add the concluding details to your Easter Bunny drawing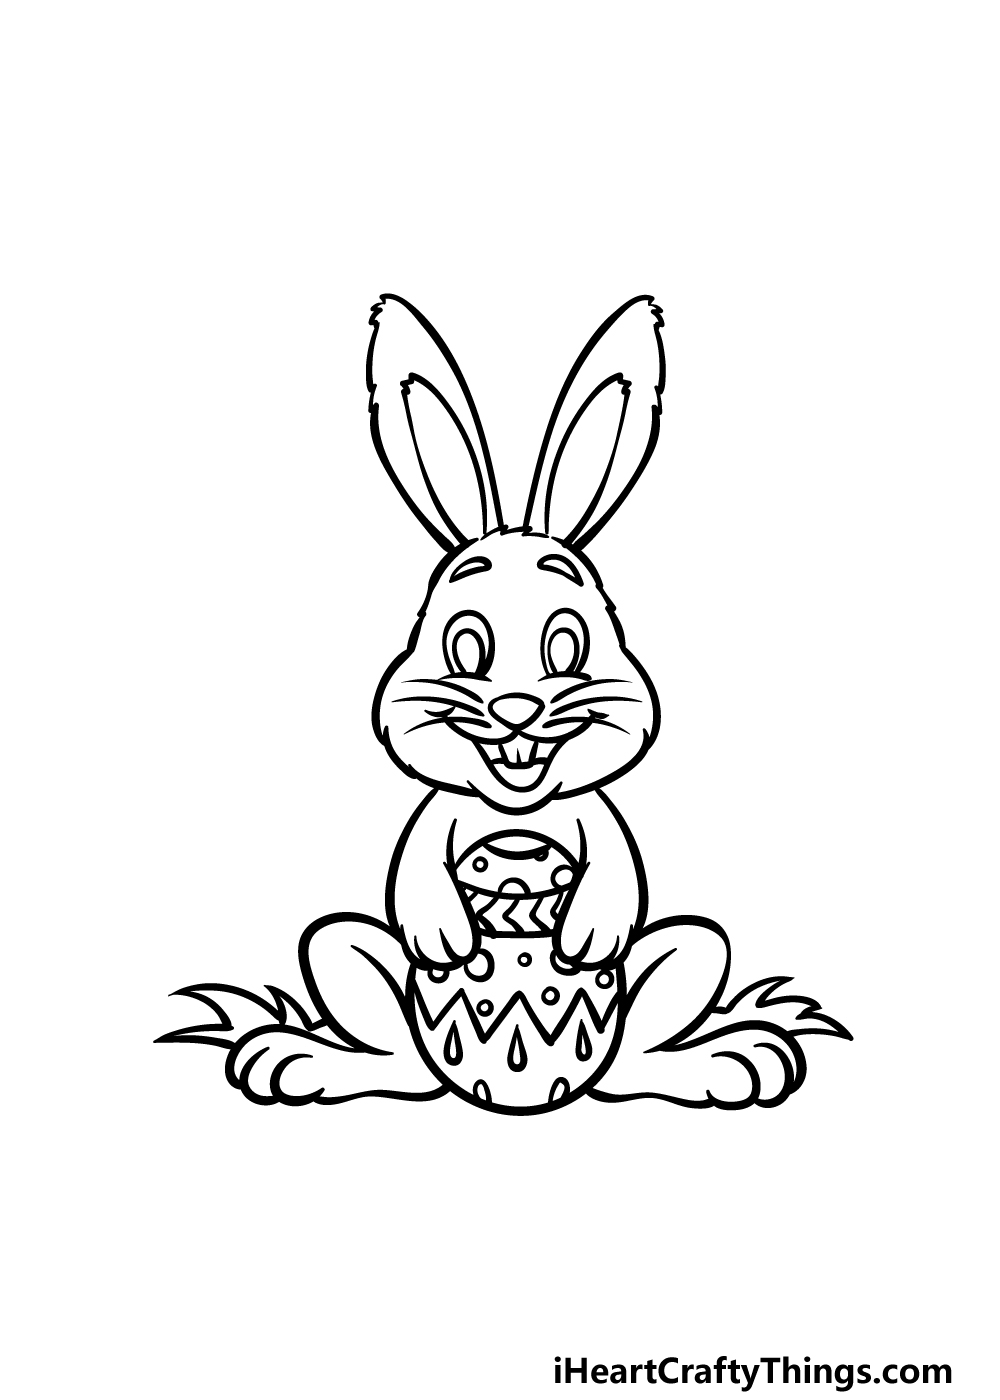
This 5th pace of our guide on how to draw the Easter Bunny will be all nearly finishing upwards some final details and additions.
First, nosotros added some precipitous, pointy jagged lines at the base of the rabbit for the grass that information technology is sitting on. Then, we added a line to the interior of the mouth to requite it some more than depth.
Once you accept drawn these details, you could also add some additional details of your own!
One idea could be to fill the background with dozens of colorful Easter eggs, and this would actually put your creative skills to the test!
How will you cease upwards this Easter Bunny before we proceed to the terminal role of this guide?
Pace 6 – Cease off your Easter Bunny cartoon with color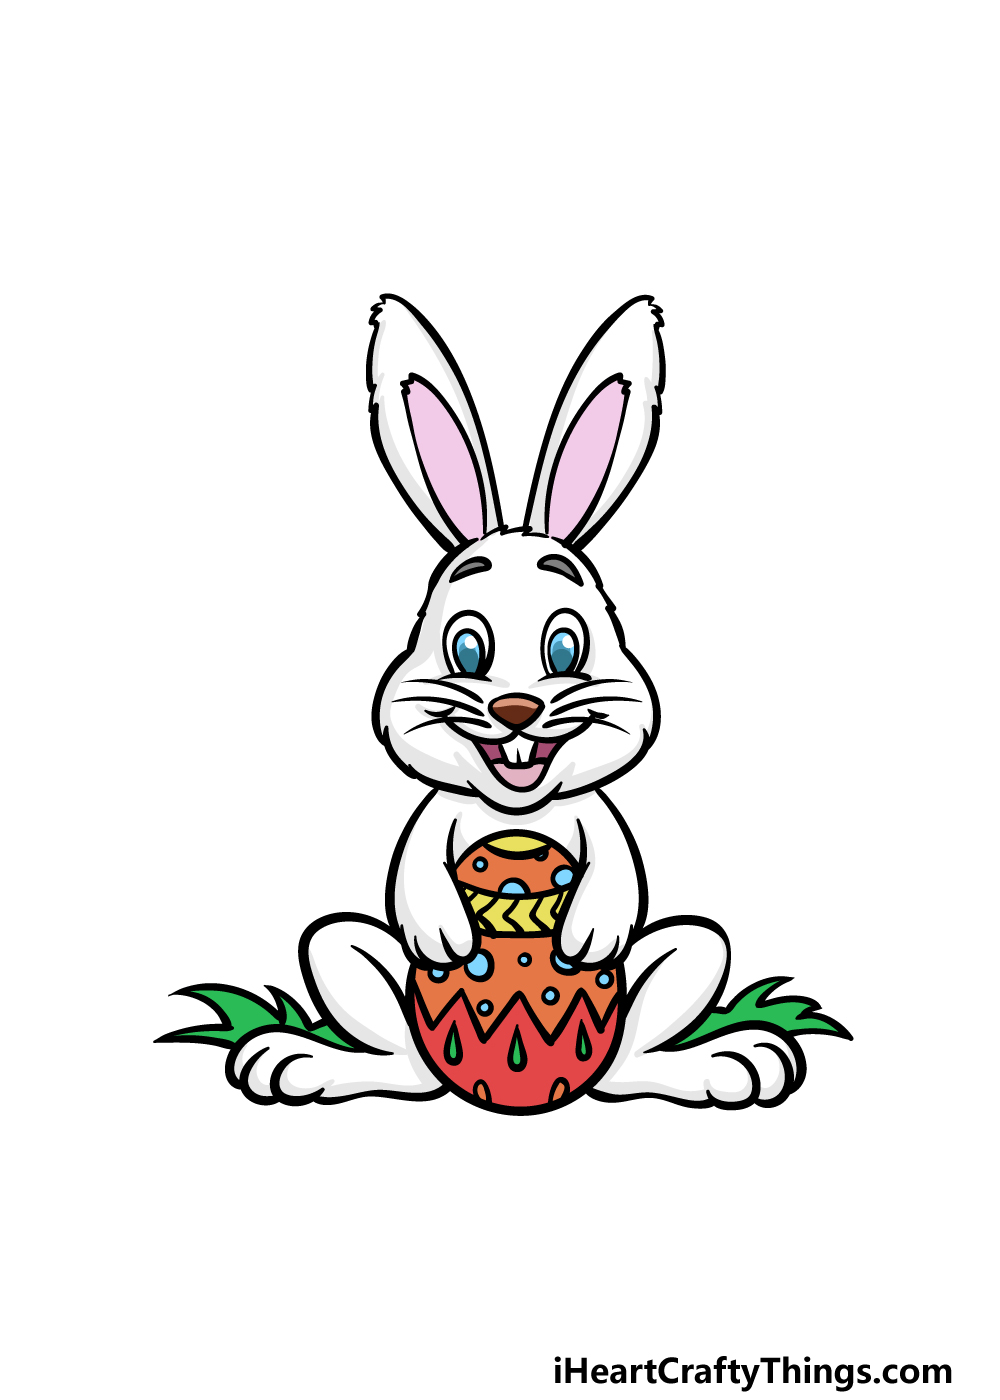
Information technology'south now fourth dimension to have some coloring fun as you truly terminate off this image! The colour focal point of this epitome would certainly exist the Easter egg he is holding.
We used some warm, bright colors for the egg and and so kept the colors of the rabbit a bit more muted in contrast.
Y'all could apply any of your favorite colors when coloring the egg and the rabbit! Y'all could also experiment with some fine art mediums such as paints, colored markers or pens.
What colors and mediums will you use to finish off this Easter creation? Nosotros can't wait to see the creative ways that you will become almost coloring this astonishing pic!
Your Easter Bunny Drawing is Complete!
Yous have made it through all 6 steps of this guide on how to depict the Easter Bunny, and nosotros hope that yous had a great time working on it!
This may be the hardest working bunny in the world, but we hope that the steps in this guide made this drawing challenge a cakewalk for you.
When you take completed this adorable delineation of the Easter Bunny, you can go along the fun going with your ain additions and touches.
We mentioned how you can modify upwards the colors and add together groundwork details, only what else tin can you lot think of to finish it off?
In that location are many more drawing guides but waiting to be discovered on our website, then be sure to visit u.s.a. there for more fun! We take plenty more we volition be bringing out presently, and yous won't want to miss them.
You can also evidence off how wonderful your Easter Bunny drawing looks by sharing the finished drawing on our Facebook and Pinterest pages!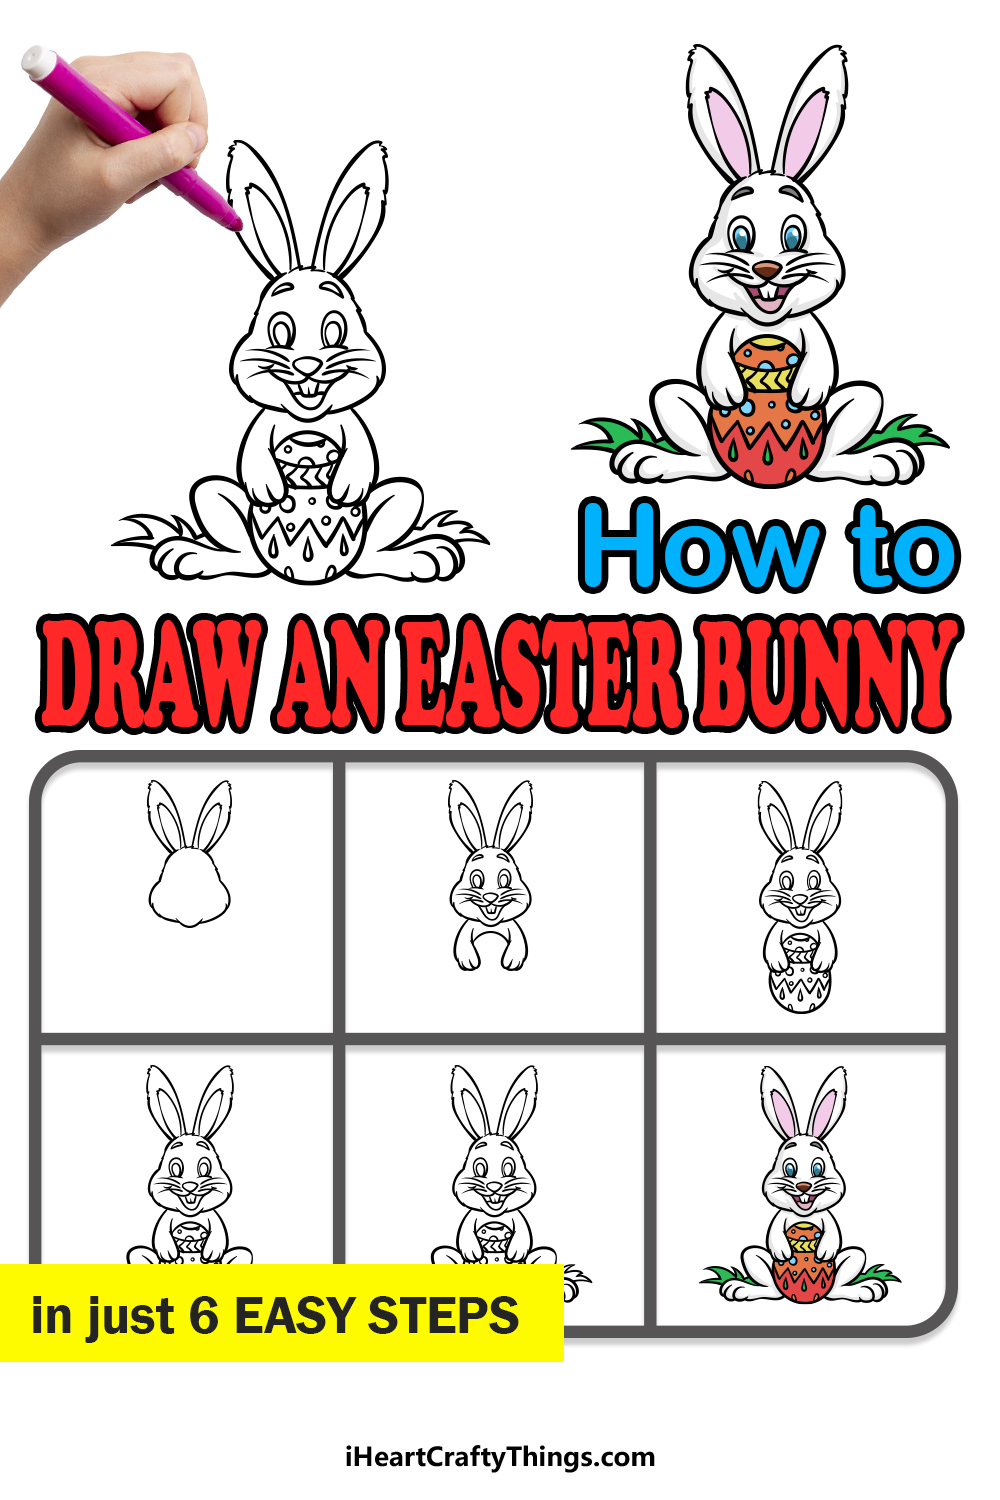

Source: https://iheartcraftythings.com/easter-bunny-drawing.html
Posted by: howlandthiled.blogspot.com
0 Response to "How To Draw Easter Bunny Easy"
Post a Comment